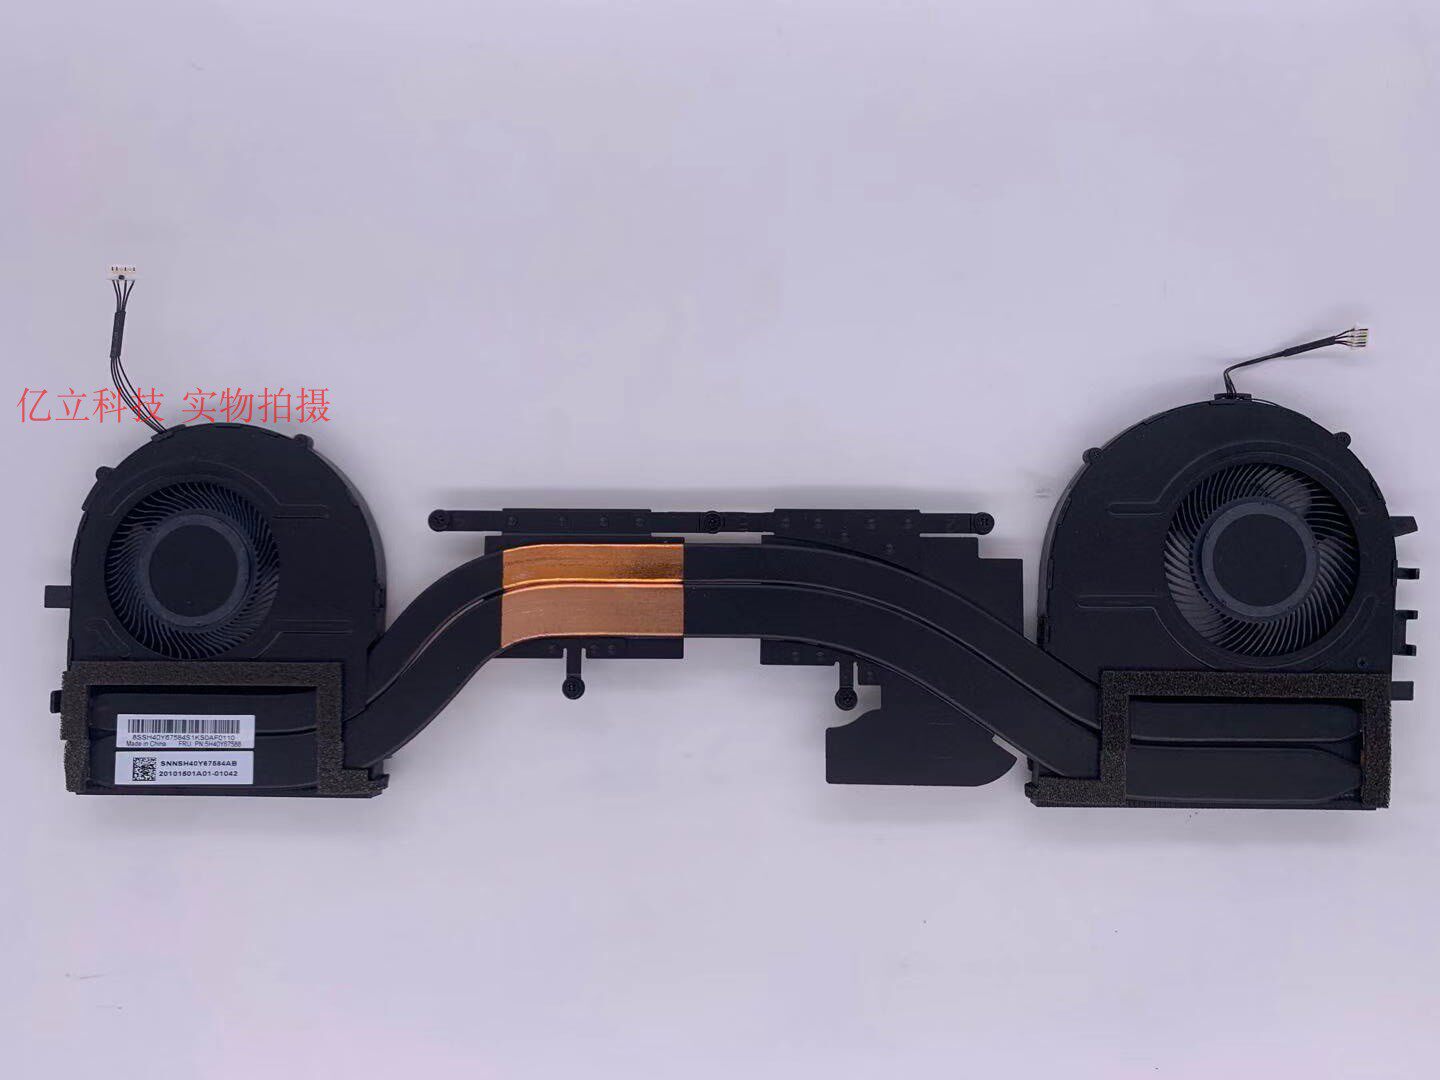
Replacement Cooling Heatsink and Dual Fan Assembly for Lenovo ThinkPad P1 Gen 3 and X1 Extreme Gen 3
Maintain the peak performance of your high-end workstation with this premium, integrated cooling solution. Specifically engineered for the 2020 editions of the Lenovo ThinkPad P1 Gen 3 and X1 Extreme Gen 3, this thermal module is designed to handle the intense heat generated by professional-grade CPUs and GPUs. Whether you are rendering complex 3D models or compiling massive datasets, this replacement unit ensures your system remains stable and throttles less under heavy workloads.
Key Benefits
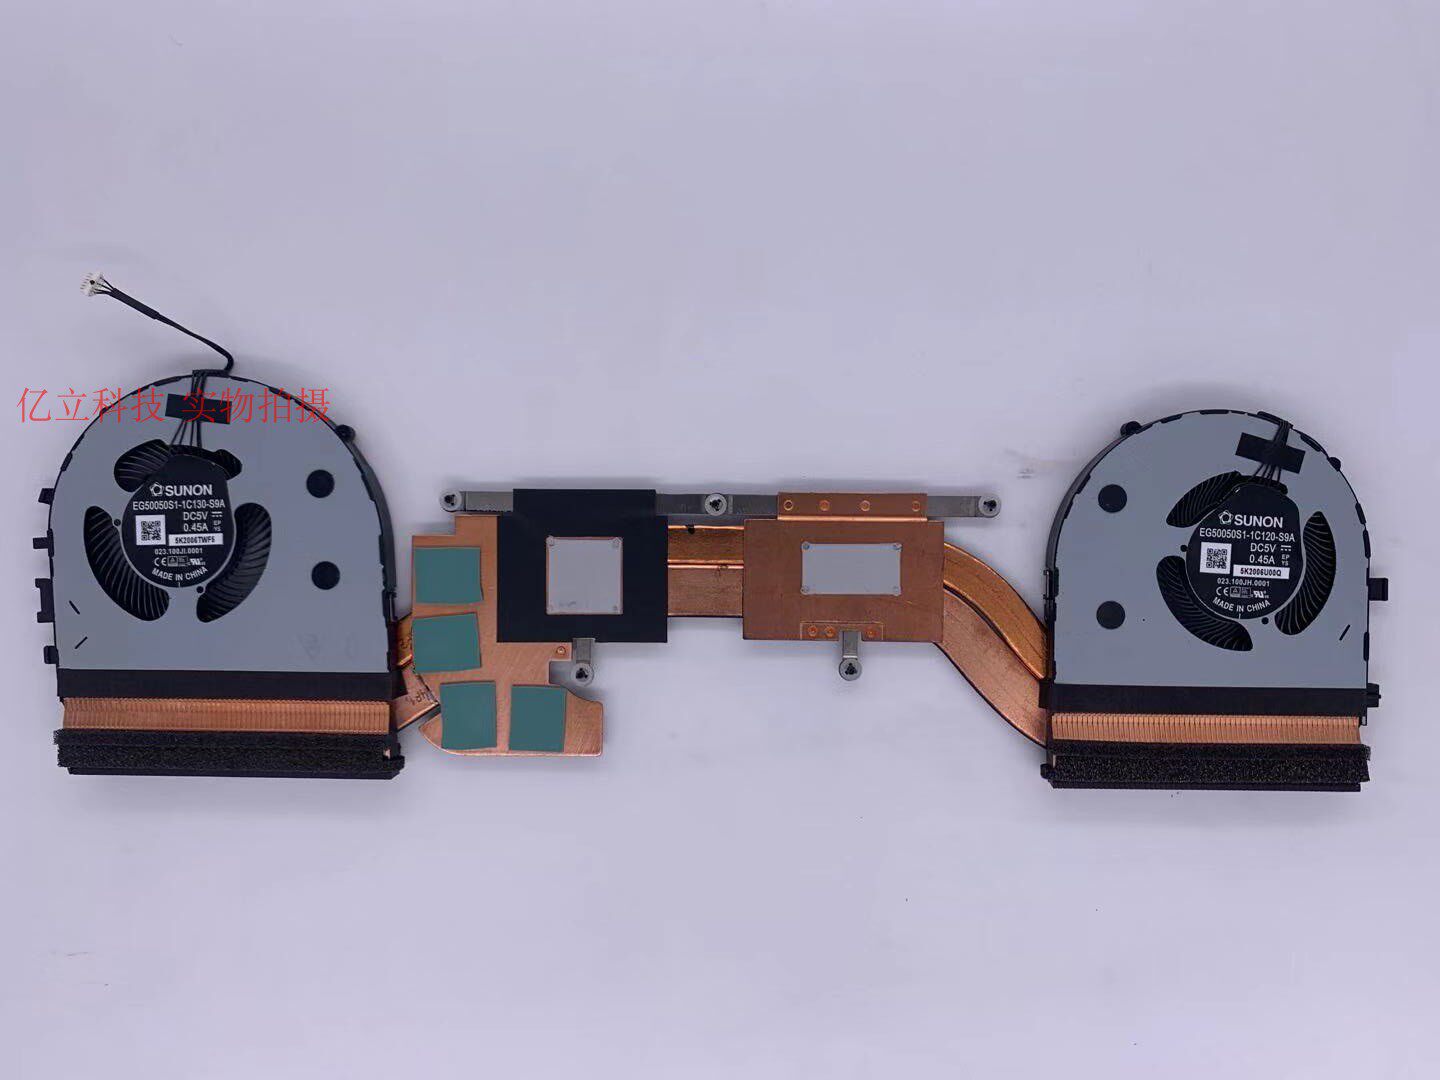
- Genuine Sunon Motor Technology: Featuring high-efficiency fans manufactured by Sunon, a leader in thermal technology. These fans are designed for long-term reliability, offering high CFM (cubic feet per minute) airflow while maintaining the whisper-quiet acoustics expected of the ThinkPad line.
- Integrated Dual-Fan Architecture: This assembly utilizes a dual-fan system that works in tandem with high-conductivity copper heat pipes to rapidly pull heat away from critical components and exhaust it out of the chassis.
- Pre-Applied Thermal Interface: To simplify the installation process and ensure optimal heat transfer, the heatsink comes with factory-applied thermal grease. This eliminates the guesswork of application and provides a professional-grade seal between the chips and the copper plates.
- Precision Engineering for 2020 Models: This is a direct-fit replacement for the 2020 refresh of the P1 and X1 Extreme series. Every screw hole and connector is aligned to match the original factory specifications for a seamless "drop-in" repair.
Key Specifications
- Compatibility: Lenovo ThinkPad P1 Gen 3 (2020), ThinkPad X1 Extreme Gen 3 (2020).
- Component Type: Full Thermal Module (Heatsink + Dual Fans).
- Material: High-grade copper heat pipes and aluminum cooling fins.
- Fan Brand: Sunon.
- Thermal Interface: Pre-applied thermal paste included on the contact plates.
How to Use
Replacing a thermal module requires careful handling of internal laptop components. Before beginning, ensure the laptop is powered off and the internal battery is disabled or disconnected. You will need a small Phillips head screwdriver to remove the bottom casing and the screws securing the heatsink.
- Loosen the captive screws on the existing heatsink in the reverse order of the numbers printed on the metal.
- Gently lift the old module and disconnect the two fan headers from the motherboard.
- Clean any old residue from the CPU and GPU dies using isopropyl alcohol.
- Align the new module, connect the fan headers, and tighten the screws in the numerical sequence (1 through 6 or 8) to ensure even pressure across the processors.
Care & Safety
- ESD Protection: Always use an anti-static wrist strap or touch a grounded metal object before touching internal electronics to prevent electrostatic discharge.
- Heat Pipe Integrity: Do not bend or put pressure on the copper heat pipes, as they contain a vacuum-sealed liquid that can be rendered useless if the pipe is kinked or cracked.
- Storage: Keep the unit in its protective packaging until the moment of installation to prevent dust or debris from contaminating the pre-applied thermal grease.
Notes
"2020款P1 X1 Extreme全新原装" (Brand new original 2020 model P1 X1 Extreme).